Using Jupyter Hub
Link to section 'What is Jupyter Hub' of 'Using Jupyter Hub' What is Jupyter Hub
Jupyter is an acronym meaning Julia, Python and R. The application was originally developed for use with these languages but now supports many more. Jupyter stores your project in a notebook. It is called a notebook because it is not just a block of code but rather a collection of information that relate to a project. The way you organize your notebook can explain processes and steps taken as well as highlight results. Notebooks provide a variety of formatting options while downloading so you can share the project appropriately for the situation. In addition, Jupyter can compile and run code, as well as save its output, making it an ideal workspace for many types of projects.
Jupyter Hub is currently available here or under the url https://notebook.scholar.rcac.purdue.edu.
Link to section 'Getting Started' of 'Using Jupyter Hub' Getting Started
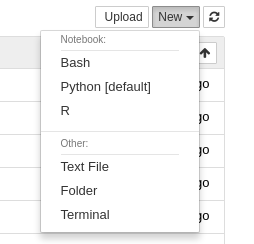
When you are logging to Jupyter Hub on one of the clusters you need to use your career account credentials. After, you will see the contents of your home directory in a file explorer. To start a new notebook click the "New" dropdown menu at the right-top and select one of the kernels available. Bash, R or Python.
Link to section 'Create your own environment' of 'Using Jupyter Hub' Create your own environment
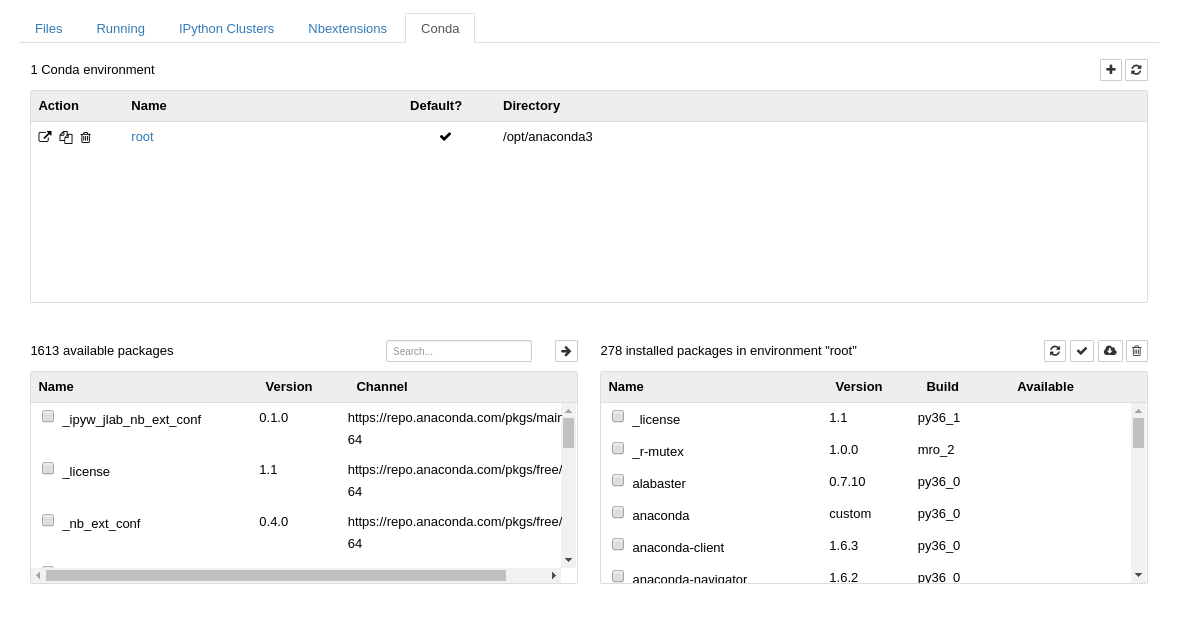
You can create your own environment in a kernel using a conda environment. Whatever environment you have created using conda can become in a Kernel ready to use in Jupyter Hub, just following some steps in the terminal or from the conda tab in the Jupyter Hub dashboard.
Below are listed the steps needed to create the environment for Jupyter from the terminal.
-
Load the anaconda module or use your own local installation.
$ module load anaconda/5.1.0-py36 -
Create your own Conda environment with the following packages.
$ conda create -n MyEnvName ipython ipykernel [...more-needed-packages...](and if you need a specific Python version in your environment, you can also add a
python=x.yspecification to the above command). -
Activate your environment.
$ source activate MyEnvName -
Install the new Kernel.
$ ipython kernel install --user --name MyEnvName --display-name "Python (My Own MyEnvName Kernel)"The
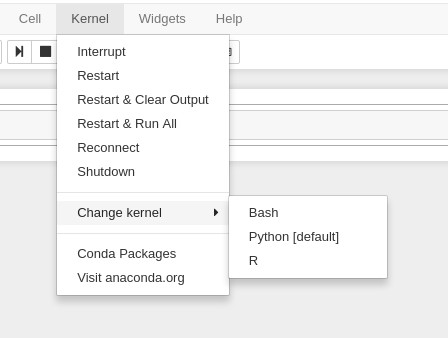
--namevalue is used by Jupyter internally. These commands will overwrite any existing kernel with the same name.--display-nameis what you see in the notebook menus. - Go to your Jupyter dashboard and reload the page, you will see your own Kernel when you create a new Notebook. If you want to change the Kernel in the current Notebook, just go to the Kernel tab and select it from the "Change Kernel" option.
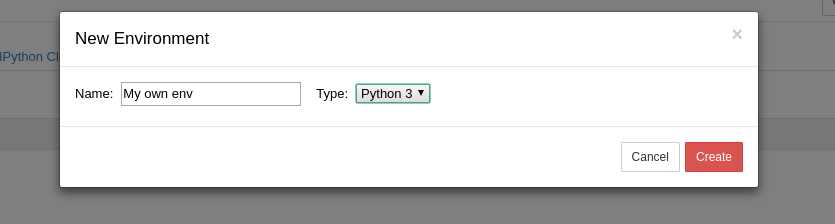
If you want to create the environment from the Dashboard, just go to the conda tab and create a new one with one of the available kernels, it will take some minutes while all base packages are being installed, after the new environment shows up in the list you can just select the libraries you want from the box under the list.
Additionally, You can change the environment you are using at any time by clicking the "Kernel" dropdown menu and selecting "Change kernel".
If you want to install a new kernel different from Python (e.g. R or Bash), please refer to the links at the end.
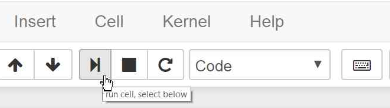
To run code in a cell, select the cell and click the "run cell" icon on the toolbar.
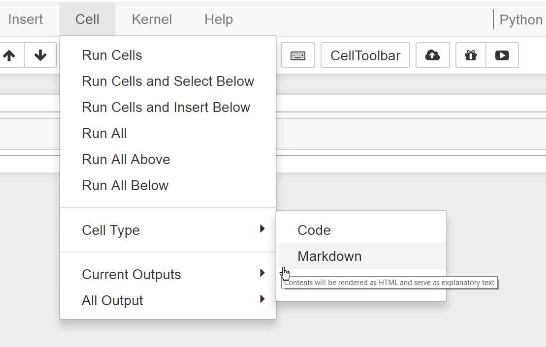
To add descriptions or other plain text change the cell to markdown format. Any standard markdown tags will apply after you click the "run cell" tool.
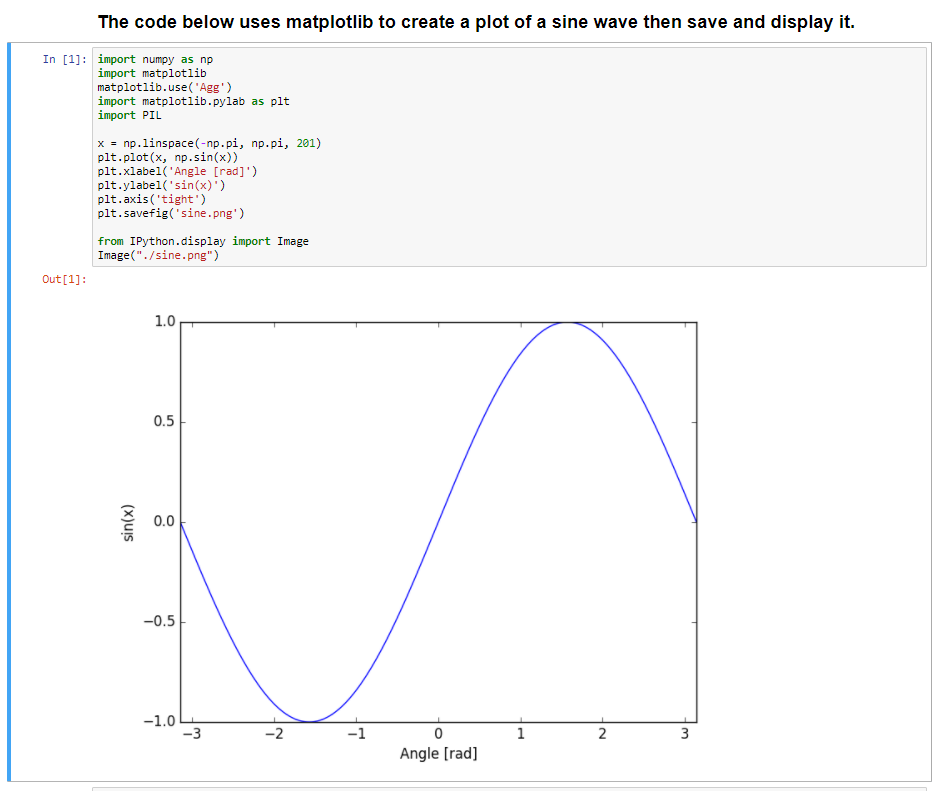
Below is a simple example of a notebook created following the steps outlined above.
For more information about Jupyter Hub, kernels and example notebooks: