
Gateway (Open OnDemand)
Bell's Gateway is an open-source HPC portal developed by the Ohio Supercomputing Center. Open OnDemand allows one to interact with HPC resources through a web browser and easily manage files, submit jobs, and interact with graphical applications directly in a browser, all with no software to install. Bell has an instance of OnDemand available that can be accessed via gateway.bell.rcac.purdue.edu.
Link to section 'Logging In' of 'Gateway (Open OnDemand)' Logging In
To log into Gateway:
- Navigate to gateway.bell.rcac.purdue.edu
- Log in using your Career account username and Purdue Login Duo client.
On the splash page you will see a quota usage report. If you are over 90% on any of your quotas a warning will be displayed. This information will update every 10-15 minutes while you are active on Gateway.
Link to section 'Apps' of 'Gateway (Open OnDemand)' Apps
There are a number of built-in apps in Gateway that can be accessed from the top menu bar. Below are links to documentation on each app.
Interactive Apps
There are several interactive apps available through Gateway that can be accessed through the Interactive Apps dropdown menu. These apps are provided with a basic node and software configuration as a 'quick-launch' option to get your work up and running quickly. For simplicity, minimal options are provided - these apps are not intended for complex configuration/customization scenarios.
After you a submit an interactive app to the queue, Gateway will track and manage the session. Once it starts, you may connect and disconnect from the session in your browser, leaving the job running while you log out of your browser.
Each of the available apps are documented through the following links.
Compute Node Desktop
The Compute Node Desktop app will launch a graphical desktop session on a compute node. This is similar to using Thinlinc, however, this gives you a desktop directly on a compute node instead on a front-end. This app is useful if you have a custom application or application not directly available as an interactive app you would like to run inside Gateway.
To launch a desktop session on a compute node, select the Bell Compute Desktop app. From the submit form, select from the available options - the queue to which you wish to submit and the number of wallclock hours you wish to have job running. There is also a checkbox that enable a notification to your email when the job starts.
After the interactive job is submitted you will be taken to your list of active interactive app sessions. You can monitor the status of the job from here until it starts, or if you enabled the email notification, watch your Purdue email for the notification the job has started.
Once it is indicated the job has started you can connect to the desktop with the "Launch noVNC in New Tab" button. The session will be terminated after the wallclock hours you specified have elapsed or you terminate the session early with the "Delete" button from the list of sessions. Deleting the session when you are finished will free up queue resources for your lab mates and other users on the system.
Jupyter Notebook
The Notebook app will launch a Notebook session on a compute node and allow you to connect directly to it in a web browser.
To launch a Notebook session on a compute node, select the Notebook app. From the submit form, select from the available options:
- Queue: This is a dropdown menu from which you can select a queue from all of the queues to which you have permission to submit.
- Walltime: This is a field which expects a number and represents how many hours you want to keep the session running. Note that this value should not exceed the maximum value given next to the selected queue name from the queue dropdown menu.
- Number of Cores/GPUs: This is a field which expects a number and represents the number of your resources your session is requesting. Note that the amount of memory allocated for your session is proportional to the number of cores or GPUs that you request for your job, so if your session is running out of memory, consider increasing this value.
- Use Jupyter Lab: This is a checkbox which, when checked, will run Jupyter Lab instead of Jupyter Notebook. Both of these applications are interfaces to Jupyter, and you can launch Jupyter notebooks from within Jupyter Lab. Jupyter Notebook is more "barebones" while Jupyter Lab has additional features such as the ability to interact with additional file types.
- E-mail Notice: This is a checkbox which, when checked, will send you an e-mail notification to your Purdue e-mail that your session is ready when the scheduler has found resources to dedicate to your session.
After the interactive job is submitted you will be taken to your list of active interactive app sessions. You can monitor the status of the job from here until it starts, or if you enabled the email notification, watch your Purdue email for the notification the job has started.
Once it is indicated the job has started you can connect to the desktop with the "Connect to Jupyter" button. Once connected, you can create new notebooks, selecting the currently available Anaconda versions available as modules, and any personally created Notebook kernels.
Often times you may want to use one of your existing Anaconda environments within your Jupyter session to use libraries specific to your workflow. In order to do so, you must ensure that the Anaconda environment you want to use contains the Python packages "IPyKernel" and "IPython" which are packages that are required by Jupyter. When you create a Jupyter session, Open OnDemand will check through your existing Anaconda environments and create a Jupyter kernel for any Anaconda environment that contains these two packages, and you will be able to select to use that kernel from within the application.
The session will be terminated after the number of hours you specified have elapsed or you terminate the session early with the "Delete" button from the list of sessions. Deleting the session when you are finished will free up queue resources for your lab mates and other users on the system.
MATLAB
The MATLAB app will launch a MATLAB session on a compute node and allow you to connect directly to it in a web browser.
To launch a MATLAB session on a compute node, select the MATLAB app. From the submit form, select from the available options - the version of MATLAB you are interested in running, the queue to which you wish to submit, and the number of wallclock hours you wish to have job running. There is also a checkbox that enable a notification to your email when the job starts.
After the interactive job is submitted you will be taken to your list of active interactive app sessions. You can monitor the status of the job from here until it starts, or if you enabled the email notification, watch your Purdue email for the notification the job has started.
Once it is indicated the job has started you can connect to the desktop with the "Launch noVNC in New Tab" button. The session will be terminated after the wallclock hours you specified have elapsed or you terminate the session early with the "Delete" button from the list of sessions. Deleting the session when you are finished will free up queue resources for your lab mates and other users on the system.
RStudio Server
The RStudio app will launch a RStudio session on a compute node and allow you to connect directly to it in a web browser.
To launch a RStudio session on a compute node, select the RStudio app. From the submit form, select from the available options - the queue to which you wish to submit, and the number of wallclock hours you wish to have job running. There is also a checkbox that enable a notification to your email when the job starts.
After the interactive job is submitted you will be taken to your list of active interactive app sessions. You can monitor the status of the job from here until it starts, or if you enabled the email notification, watch your Purdue email for the notification the job has started.
Once it is indicated the job has started you can connect to the desktop with the "Connect to RStudio Server" button. The session will be terminated after the wallclock hours you specified have elapsed or you terminate the session early with the "Delete" button from the list of sessions. Deleting the session when you are finished will free up queue resources for your lab mates and other users on the system.
Files
The Files app will let you access your files in your Home Directory, Scratch, and Data Depot spaces. The app lets you manage create, manage, and delete files and directories from your web browser. Navigate by double clicking on folders in the file explorer or by using the file tree on the left.
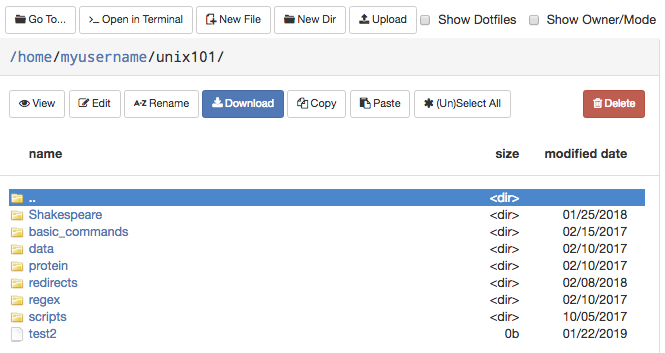
On the top row, there are buttons to:
- Go To: directly input a directory to navigate to
- Open in Terminal: launches the Shell app and navigates you to the current directory in the terminal
- New File: creates a new, empty file
- New Dir: creates a new, empty directory
- Upload: upload a file from your computer
Note: File uploads from your browser are limited to 100 GB per file. Be mindful that uploads over a few gigabytes may be unreliable through your browser, especially from off-campus connections. For very large files or off-campus transfers alternative methods such as Globus are highly recommended.
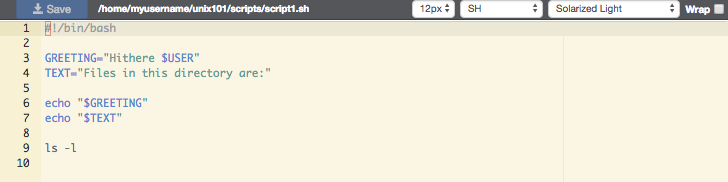
The second row of buttons lets you perform typical file management operations. The Edit button will open files in a fully fledged browser based text editor - it features syntax highlighting and vim and Emacs key bindings.
Jobs
There are two apps under the Jobs apps: Active Jobs and Job Composer. These are detailed below.
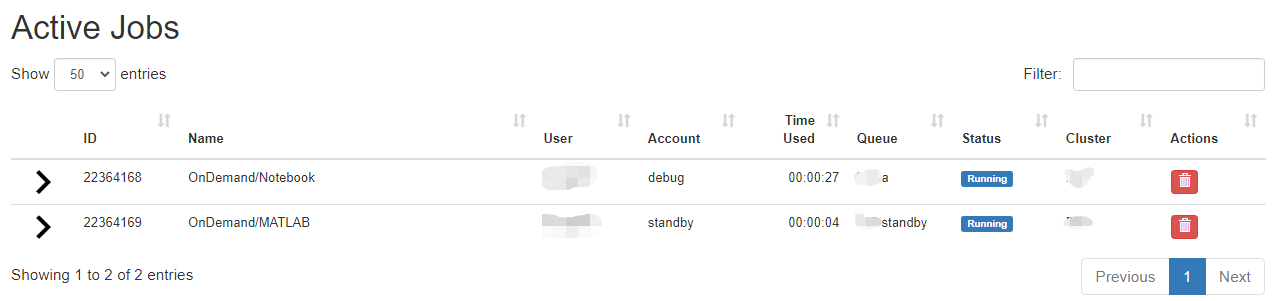
Link to section 'Active Jobs' of 'Jobs' Active Jobs
This shows you active SLURM jobs currently on the cluster. The default view will show you your current jobs, similar to squeue -u rices. Using the button labeled "Your Jobs" in the upper right allows you to select different filters by queue (account). All accounts output by slist will appear for you here. Using the arrow on the left hand side will expand the full job details.
Link to section 'Job Composer' of 'Jobs' Job Composer
The Job Composer app allows you to create and submit jobs to the cluster. You can select from pre-defined templates (most of these are taken from the User Guide examples) or you can create your own templates for frequently used workflows.
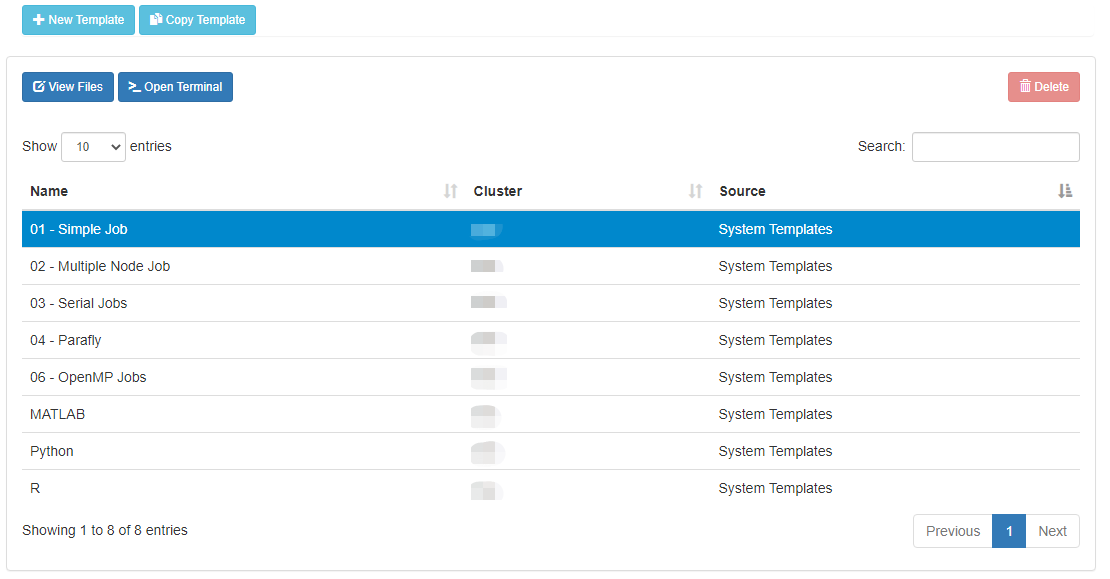
Link to section 'Creating Job from Existing Template' of 'Jobs' Creating Job from Existing Template
Click "New Job" menu, then select "From Template":
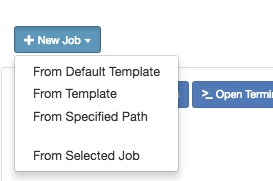
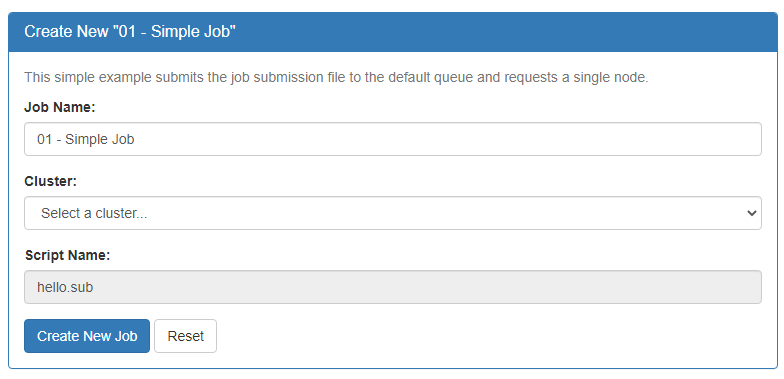
Then select from one of the available templates.
Click 'Create New Job' in second pane.
Your new job should be selected in your list of jobs. In the 'Submit Script' pane you can see the job script that was generated with an 'Open Editor' link to open the script in the built-in editor. Open the file in the editor and edit the script as necessary. By default the job will specify standby queue - this should be changed as appropriate, along with the node and walltime requests.
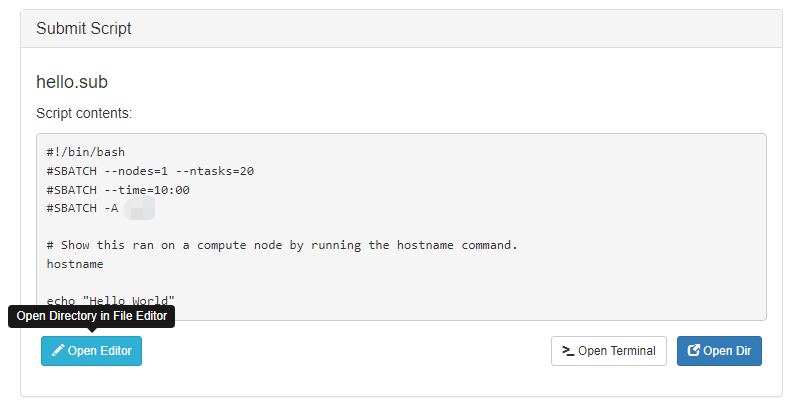
When you are finished with editing the job and are ready to submit, click the green 'Submit' button at the top of the job list. You can monitor progress from here or from the Active Jobs app. Once completed, you should see the output files appear:
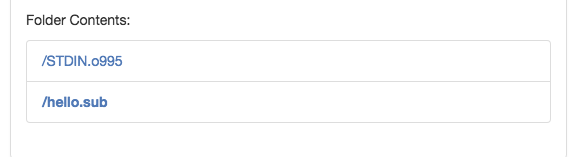
Clicking on one of the output files will open it in the file editor for your viewing.
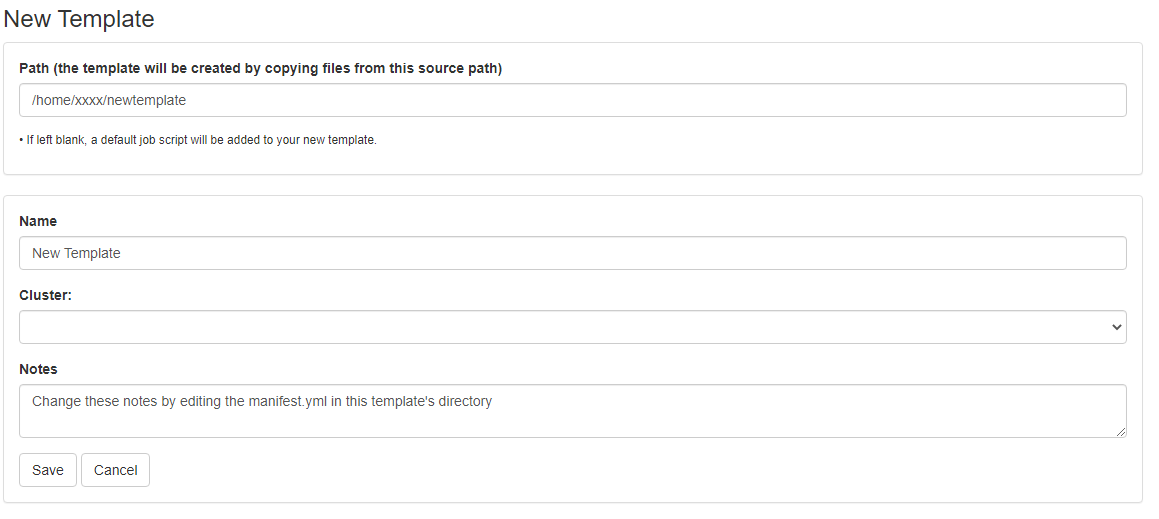
Link to section 'Creating New Template' of 'Jobs' Creating New Template
First, prepare a template directory containing a template submission script along with any input files. Then, to import the job into the Job Composer app, click the 'Create New Template' button. Fill in the directory containing your template job script and files in the first box. Give it an appropriate name and notes.
This template will now appear in your list of templates to choose from when composing jobs. You can now go create and submit a job from this new template.
Cluster Tools
The Cluster Tools menu contains cluster utilities. At the moment, only a terminal app is provided. Additional apps may be developed and provided in the future.
Link to section 'Shell Access' of 'Cluster Tools' Shell Access
Launching the shell app will provide you with a web-based terminal session on the cluster front-end. This is equivalent to using a standalone SSH client to connect to bell.rcac.purdue.edu where you are connected to one several front-ends. The normal acceptable front-end use policy applies to access through the web-app. X11 Forwarding is not supported. Use of one of the interactive apps is recommended for graphical applications.